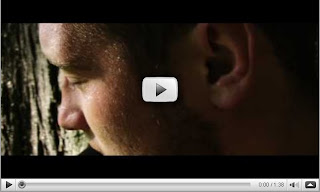
I happened to get CS4 for a really great deal (thank you student discount!) and with it came Premiere Pro, Mocha For After Effects, After Effects, Photoshop, and a bunch of other really amazing programs. Now, I had used Sony Vegas Pro before I got my grubby fingers on this bundle of amazing goodness. And actually, I ended up using Vegas to do all of the audio tracking for this test shoot. I found Premiere Pros audio to be a bit clunky but in all fairness, I'm probably just used to Vegas. :)
Anyway, I had minor surgery on my foot a few weeks back and because my work requires me to have two feet, I was off for a few weeks. It was great! I was in a boot, grew a beard, and had time to delve into After Effects as well as Mocha.
Color Correction
As a test shoot, I learned to never, ever, ever have your talent wear black-black or white-white; especially when shooting against a white car! Gross. Also, green (grass, tress, etc) is a very hard color to work with. Next time, I'll be choosing my locations and clothing PRIOR to shooting.
Effects
I shot with my humble HV20 in Shutter Priory mode, and used a 1/250 shutter (except for one shot which I used 1/48 shutter).
Used After Effects to remove pulldown and edited everything in Premier Pro. I imported the Premiere Pro project into After Effects and made a different AE (after effects) project for each clip.
I was brand spankin' new to AE and for a while I felt totally overwhelmed. But, my saving grace was videocopilot.net. Especially Andrew's basic training. Also, the people on their forum are really cool and helpful. Again, the DV Rebels Guide was a huge help, and the people on the rebel forum were a huge help too. But really, After Effects should be looked at like an oil painter looks at his brush and oils-AE doesn't make what your working on awesome, you need to learn to move the brush and manipulate the colors, so to speak. And learning how to do that is a lot of work, and a lot of fun. I don't have it all figured out by any stretch, but I'm on my way. I think it's important to point out that when your tackling something like this, just take it one step at a time.
Motion Tracking
Mocha is a delicious beverage as well as an amazing motion tracking program made by Imagineer Systems. I used it to map the bullet holes on that white (grr!) Chevy Blazer. Obviously, you can use it for a lot more than that (just check out their sample videos!) This tutorial really made the Mocha workflow click for me.
Audio
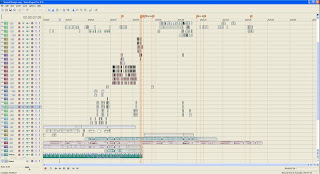
The audio was so much fun to build. I didn't use any of the sound from the shoot except for one spot during the hand-to-hand fight. I built all of it from the ground up recording sounds and using a bunch of the resources from Freesound.org.
To be honest, I stole a bunch of the gunshot sounds from Rainbow 6 Vegas2 by recording the Left and Right out of my Xbox360. Even though that game has great sound, I found a lot of the gunshots didn't sound like gunfire, but instead sounded like, well, a video game! That being said, after some EQ work and track doubling I think I achieved some nice sounding gunshots.
This is a screen grab from the audio build.
